E-contracts are at Pawlytics! This article will show you how to CREATE e-contracts. Please note that only Admin level Users are able to create and/or edit e-contracts. Any User in Pawlytics will be able to send e-contracts. To learn how to SEND e-contracts, please click here.
🚨 We recommend building your e-contracts on desktop for ease of visibility!
Table of contents (click the underlined titles to skip to that section)
- Video tutorial
- How to turn on your e-contracts feature
- Glossary of tools for formatting your contract body
Turn on your new E-Contract feature
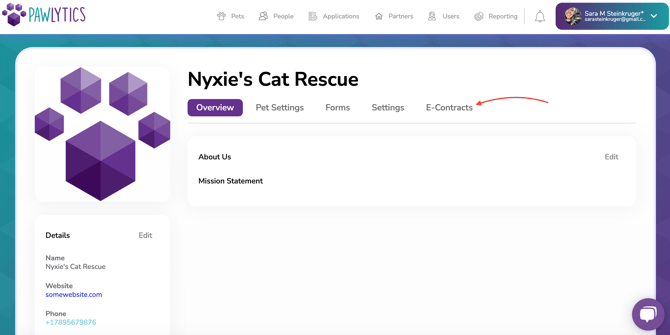
- Navigate to your organization's settings and click on "E-Contracts".
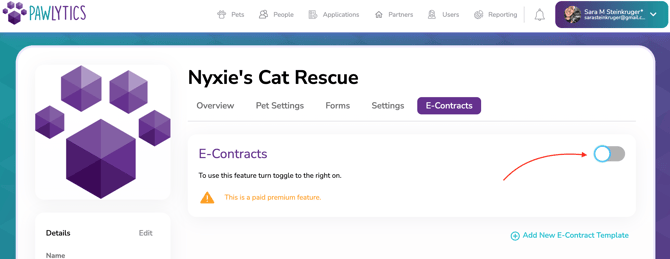
- Toggle on and confirm that you want to turn on this premium feature. Please refer to our Pricing FAQ for more details on how your monthly bill is calculated.

Create Your Contract Template
Now that your feature's been turned on, you can start creating and saving your contract templates!
If you don't already have your own contracts, we've readied some for you! Just copy and paste the contracts available at the link here: Pawlytics Contract Templates
Please note: You should still consult with a lawyer to ensure your contract meets your local and state law's standards.
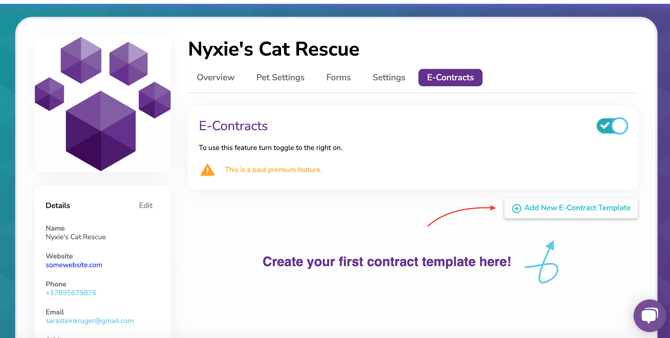
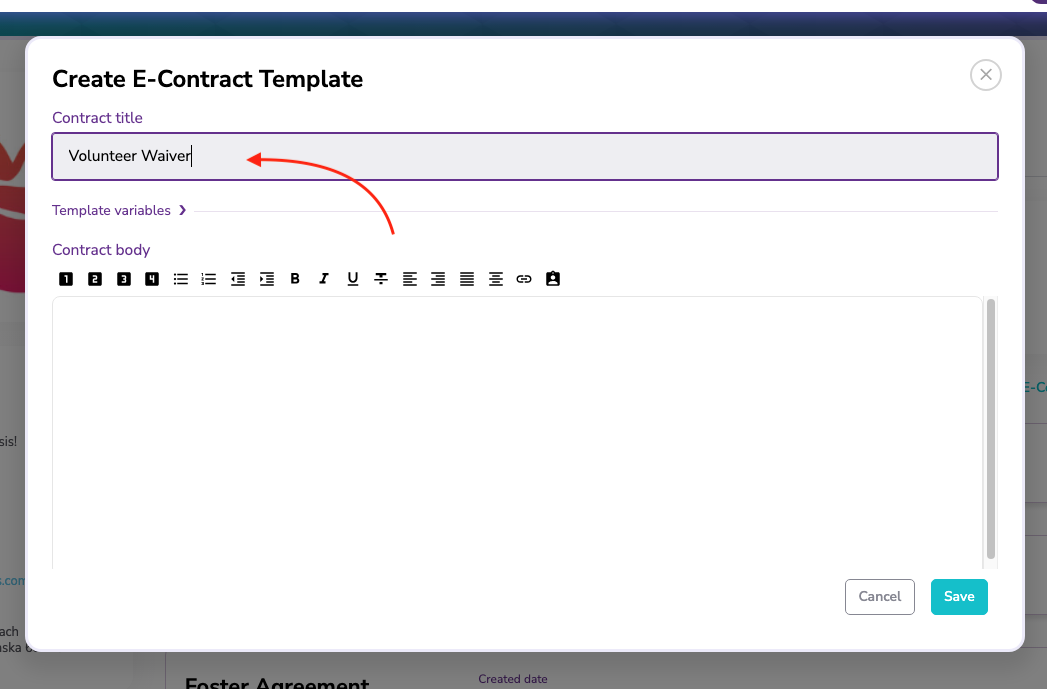
- First click on the "Add New E-contract Template" button.
- Give it a title that you'll easily recognize. This will be the name of the saved copy file you will see in the pet and/or person's file section.
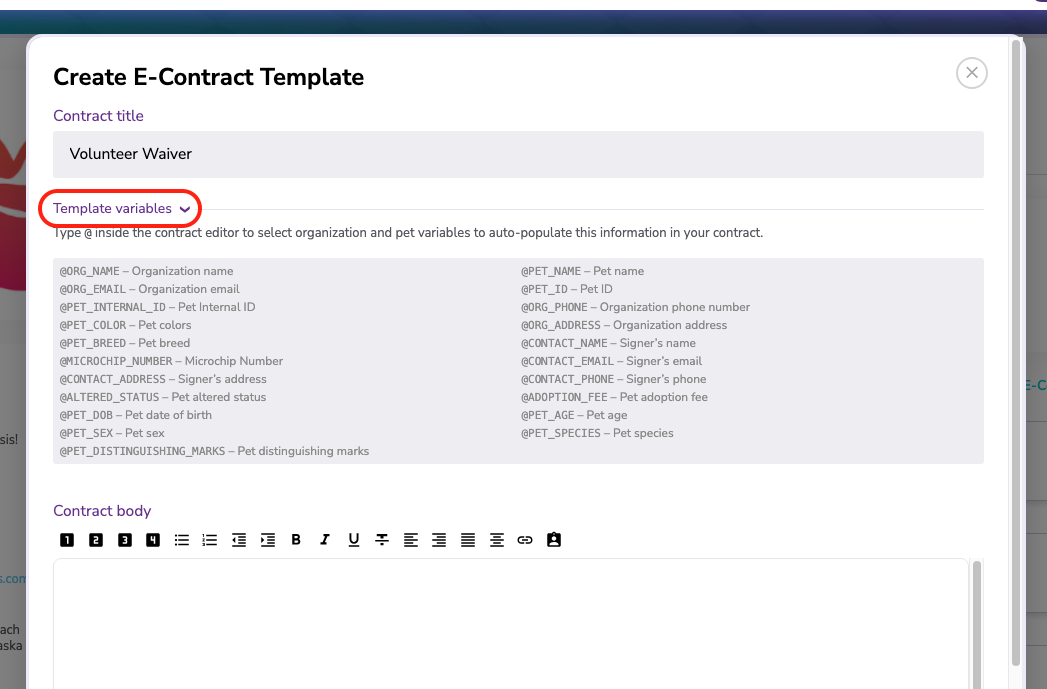
- Beneath that you'll see a toggle dropdown of all the potential information you can auto-fill from either your organization settings (rescue details) or any associated person or pet profile
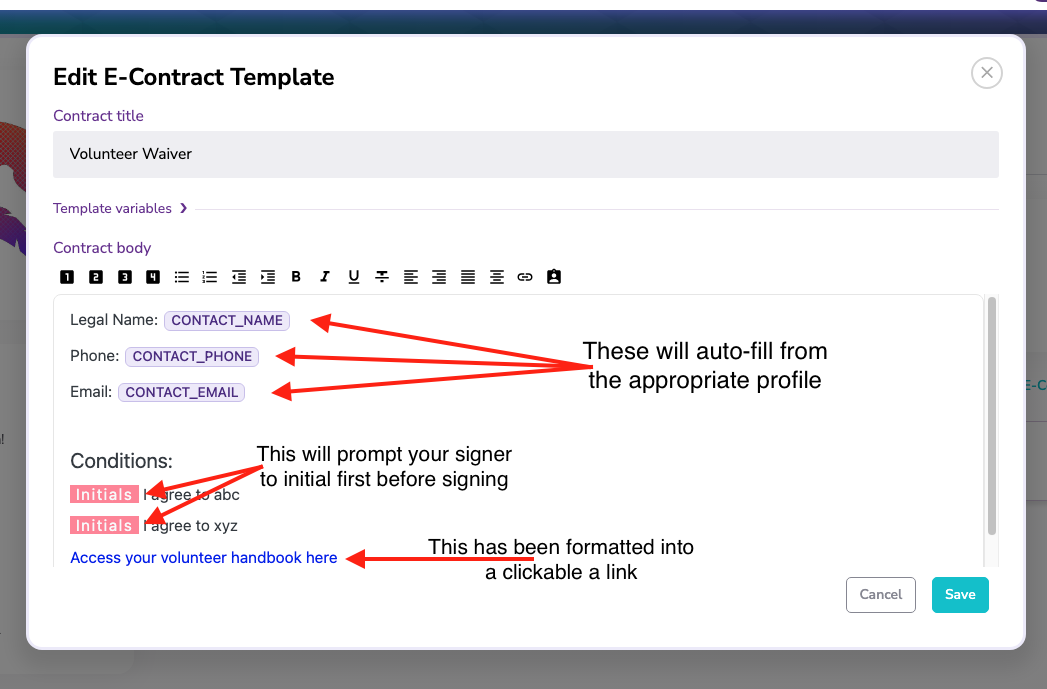
- Below that you'll see the formatting bar (details on what each icon does can be found at the bottom of this article) and below that is where you'll enter the contract's body. You can copy and paste your existing contract or build it from scratch directly in the text box.
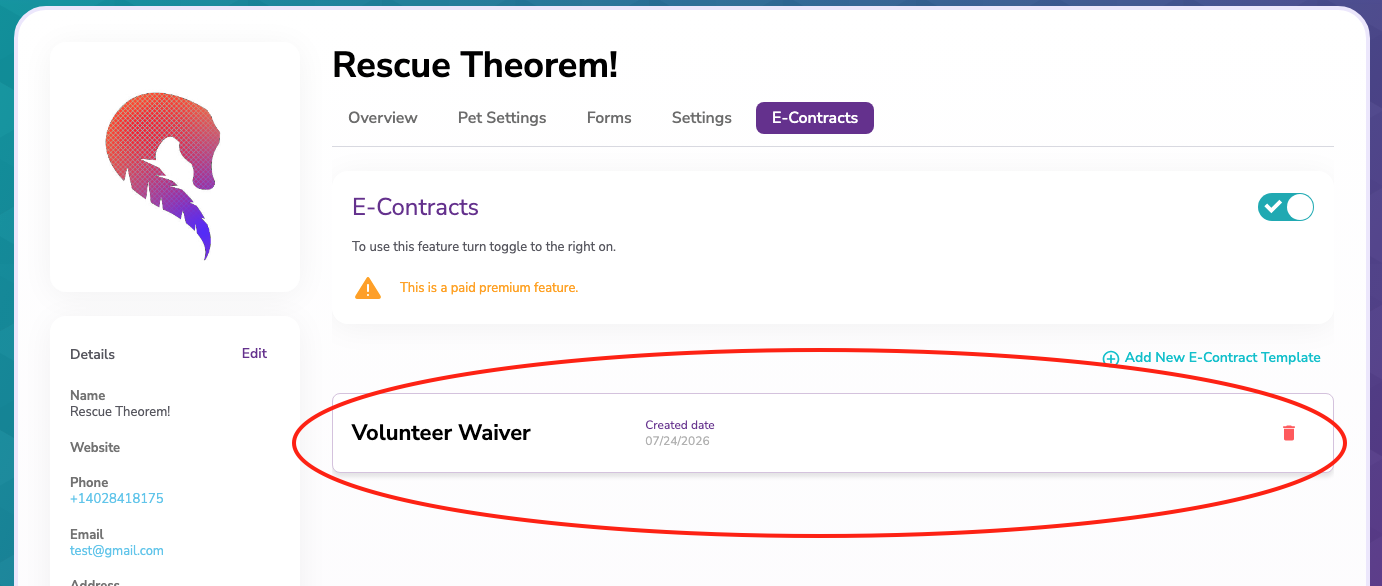
- Once you're happy with your contract, click "Save", and you'll be taken back to the E-Contracts page where you'll see your new template!

Now that you have your e-contract created, learn how to send them by clicking here!
Glossary of tools for formatting your contract body
| Icon | Format | Example |
 |
Header 1 is our largest header text option - typically used at the top of a contract |  |
 |
Header 2 is a slightly smaller header text - perfect for separating pet or people information from the body of the contract itself |  |
 |
Header 3 is smaller still - good for separating out sections of the contract agreements |  |
 |
Header 4 is the smallest header option with greyer text. Perfect for subheadings |  |
 |
This button allows you to add bulleted text lines |  |
 |
This button allows you to add numbered text lines |  |
 |
This button will decrease the indent of your text, moving it back towards the left |
Decreased indent text text text |
 |
This button increases in the indent, moving it towards the right |
text text text Increased indent |
 |
This will bold your text | Example bolded text |
 |
This will italicize your text | Example italicized text |
 |
This will underline your text | Example underlined text |
 |
This will strikethrough your text |  |
 |
This is to align your text to the left | Example left align |
 |
This it to center your text | Example center align |
 |
This is to align your text on the right | Example right align |
 |
This is justified text. Each line of text will shift so that they begin and end at the same place unless you hit "enter" for a new line. | This is an example of justified text. Think of text on book pages |
 |
This is to hyperlink your text (link text to a website) | Example link |
 |
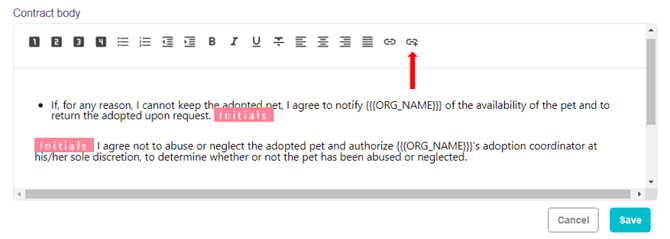
This is to ask for initials on a line |  |
Additional formatting help
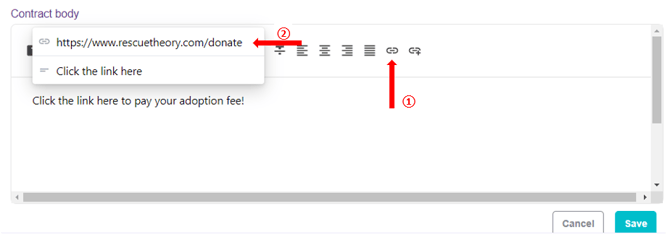
How to add a link to your contract
- To add a link to your contract, highlight the text you would like the signer to click on and click the
 button. Paste your link into the box that appears and hit enter to save.
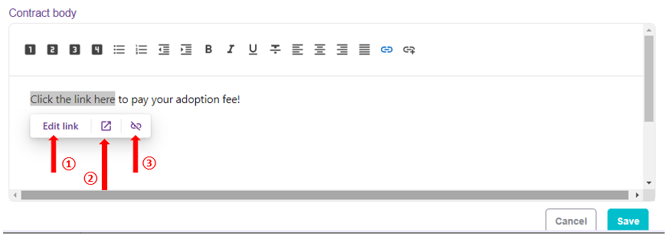
- Once you've created your link, you can now click on it in the template if you need to 1. edit the link address, 2. open the link to double check it's directing to the right page, or 3. remove the link.
How to ask for initials on certain lines
- Have your cursor where you would like the initial for the line to be (in front of the line of text, in the middle somewhere, after the text) and click the
 button.