You sure can! In the "Partners" section! Check out this article to learn how to add your first PAW-tner in Pawlytics!
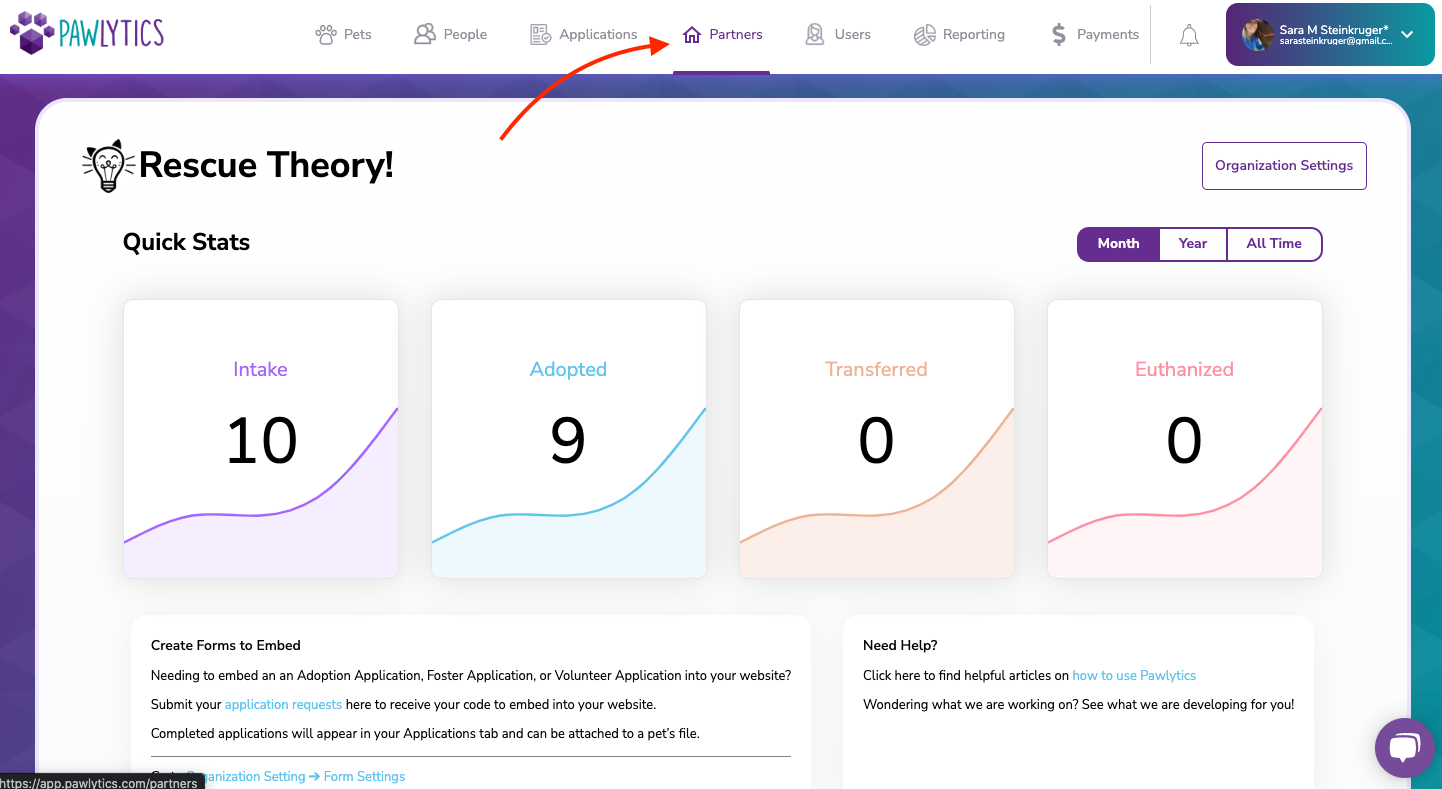
To access this section of Pawlytics, first navigate to and click on the "Partners" tab at the top of your screen.
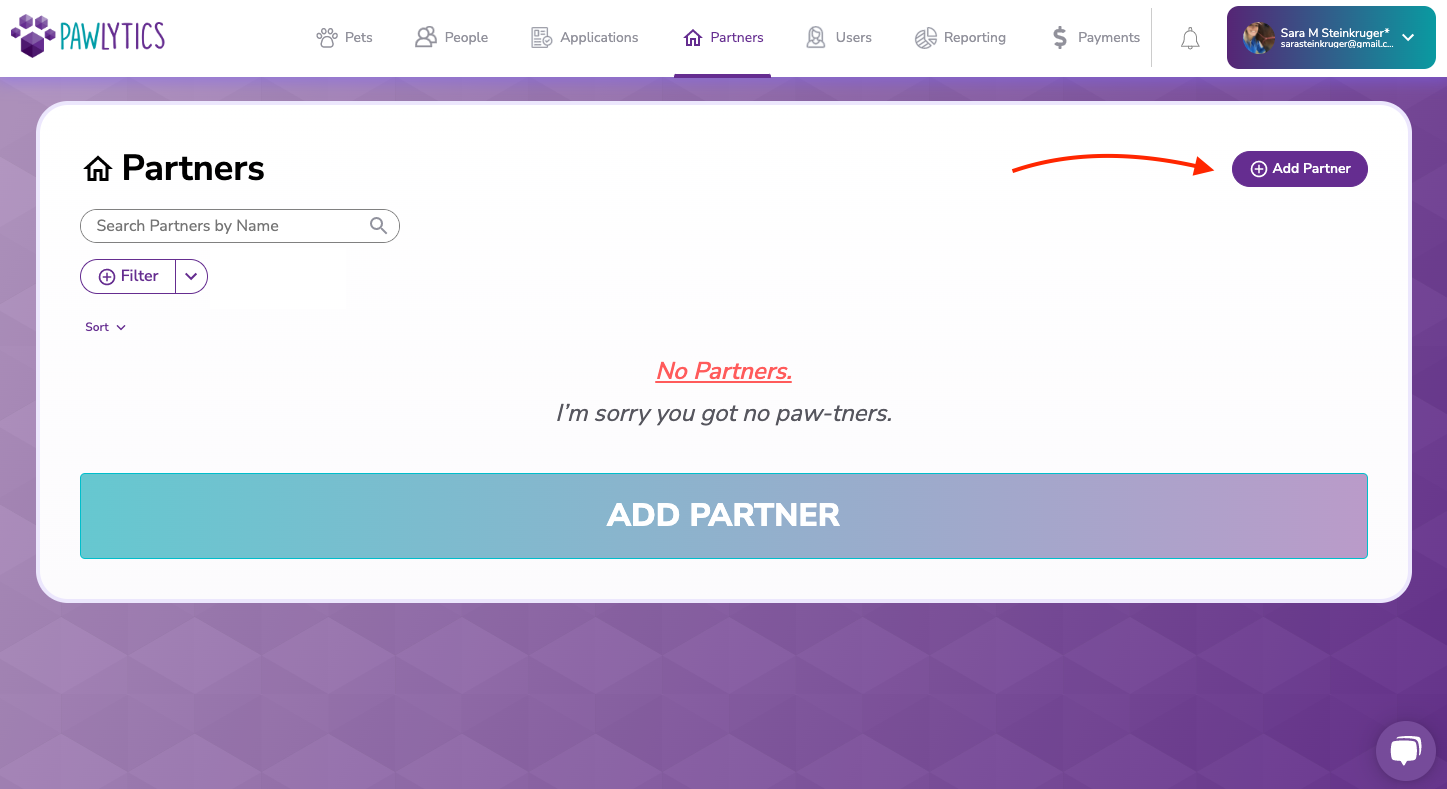
You will be taken to your "Partners" section where you will see that you have no PAW-tners. To add your first Partner click the purple "Add Partner" button.
**Note** If you were a user of Pawlytics before this release, we migrated your previous vet clinics and transfer organizations to this section for you! You will see any previous organizations you entered for pet transfer intakes and outcomes as well as your vet clinics list here right away. Your vet clinics will now live in this section now, and not within your "Organization Settings".
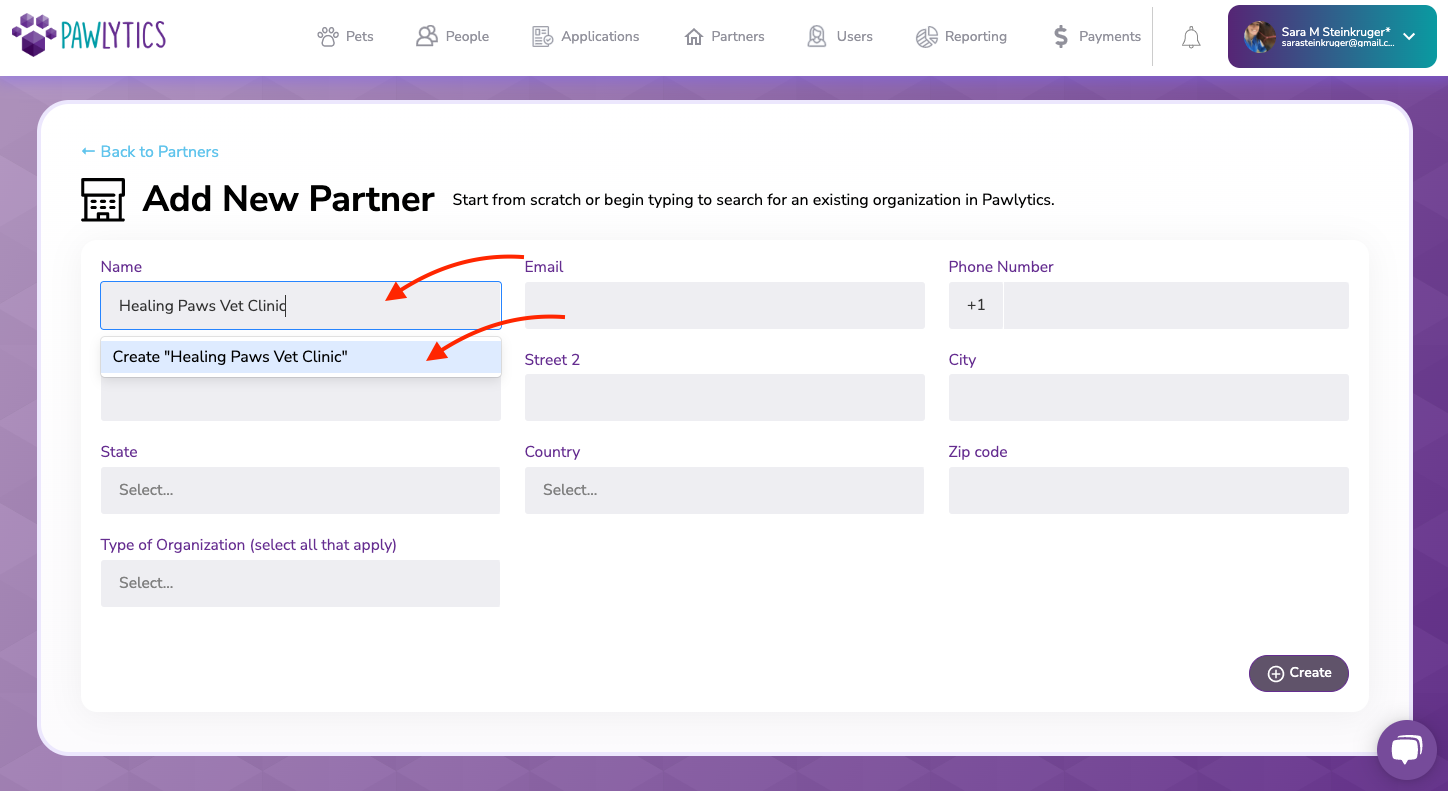
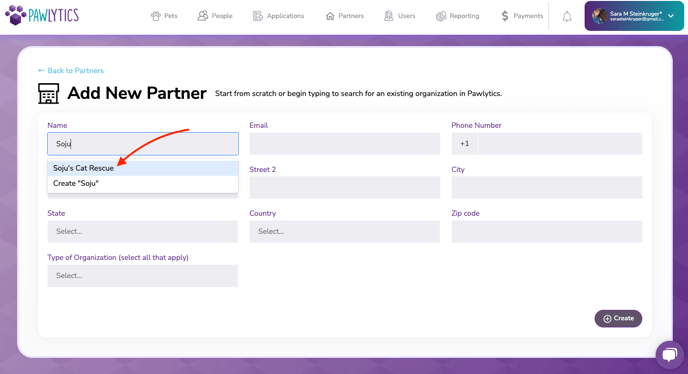
To add a new partner, start typing the name of the organization and then be sure to click on the blue highlighted "Create" text to create the partner. You can then type in and fill in the existing information.
To add an existing Pawlytics organization, type their name and click on their name that will pop up. This will autofill their information. Existing Pawlytics organizations' contact information will not be editable.
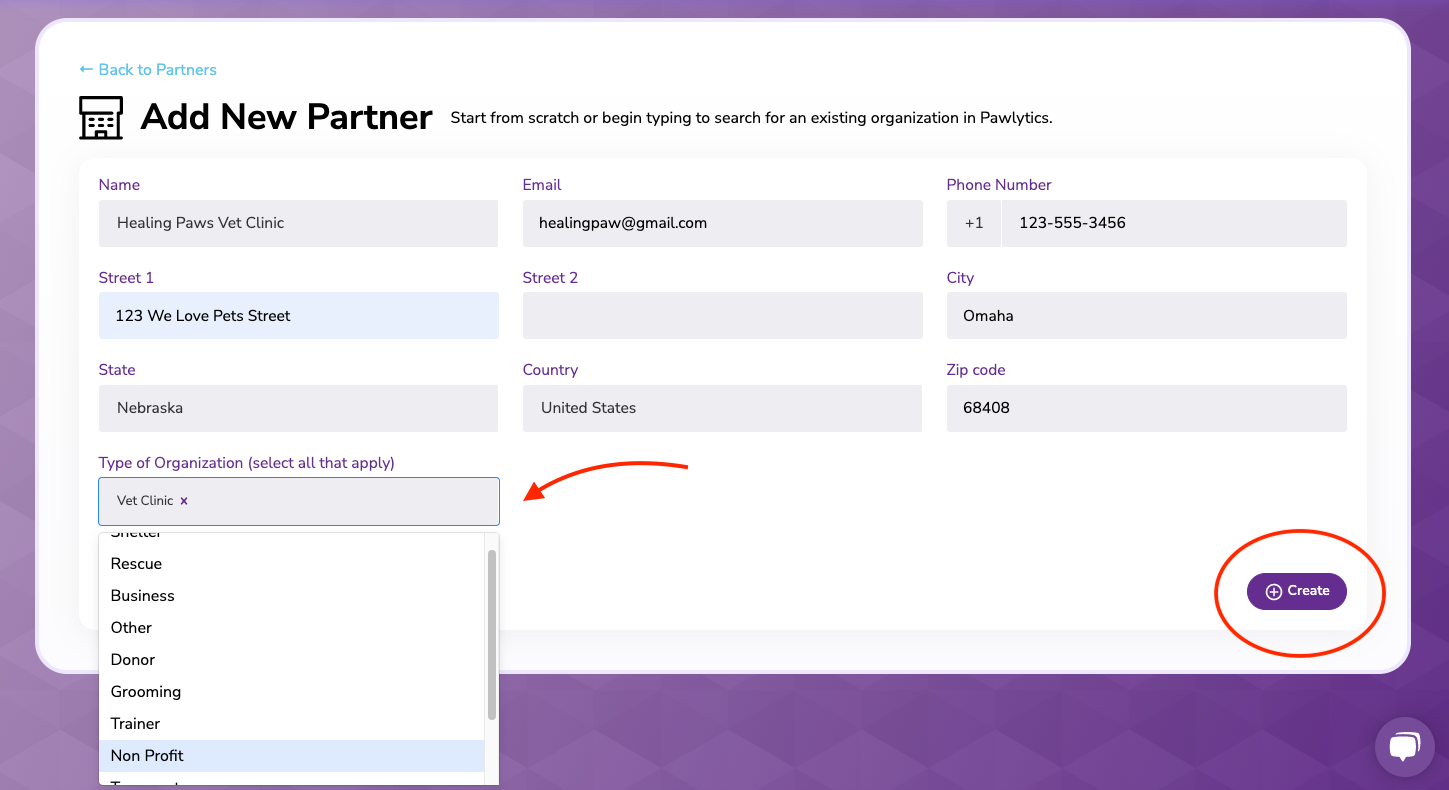
You will have a comprehensive list of tags from vet clinic and shelter to donor and non-profit to assign to the partner to help you organize them and can assign as many tags to a single partner as you need
💡NOTE: In order for a partner to appear in a pet's Intake/Outcome section as a transferring partner, it MUST be tagged as either a Rescue, Shelter, Transporter, or Vet Clinic.
To show in the medical section as a clinic your pet visited, it MUST be tagged as a Vet Clinic.
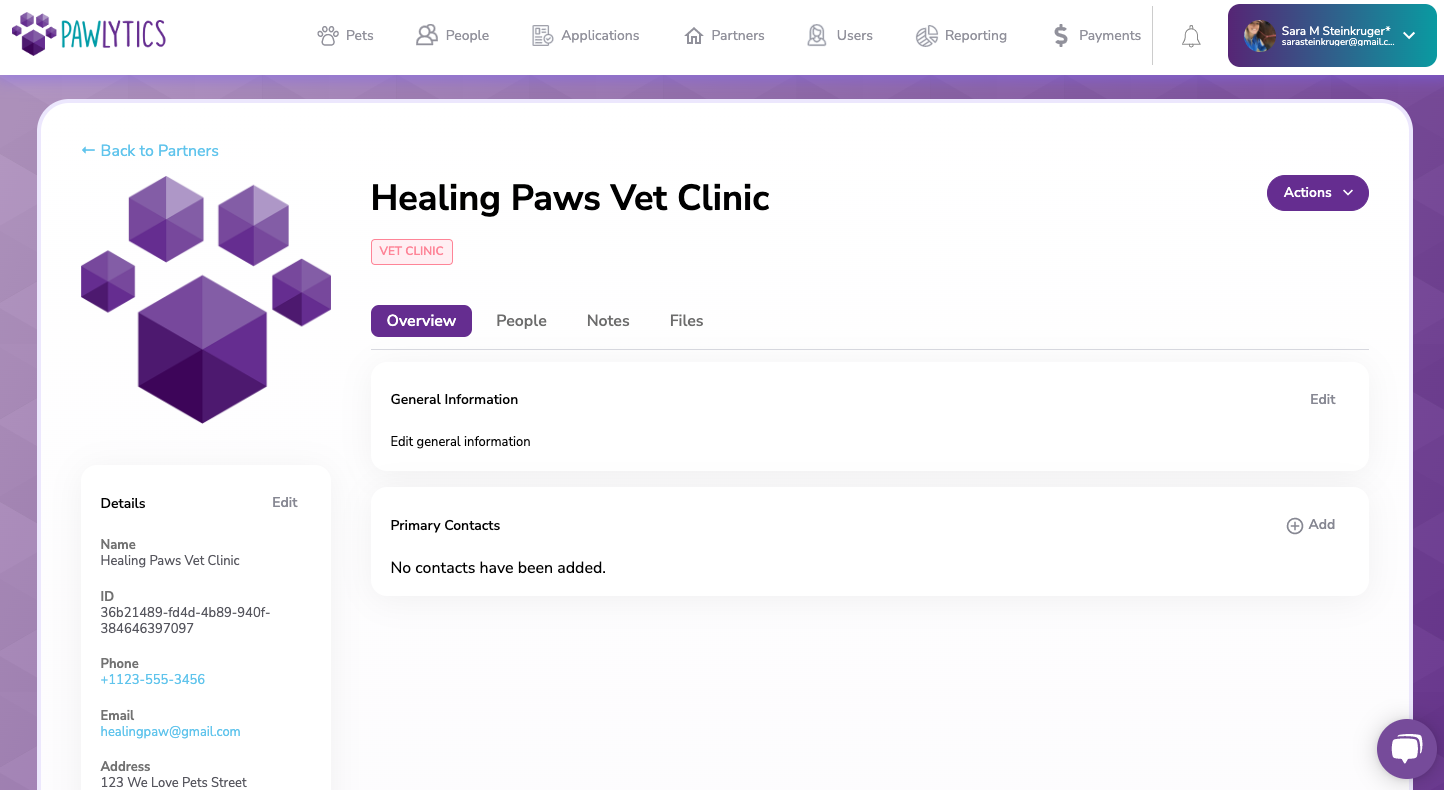
Once you have all of this information filled out, click "Create" to create the Partner.
You will then be taken to your new partner's profile. From here you can edit their information, add contacts, notes, and files! Click here to learn how to connect people to your partners' profiles!
