![Pawlytics_Paw-1.png]](https://learn.pawlytics.com/hs-fs/hubfs/Pawlytics_Paw-1.png?height=40&name=Pawlytics_Paw-1.png)
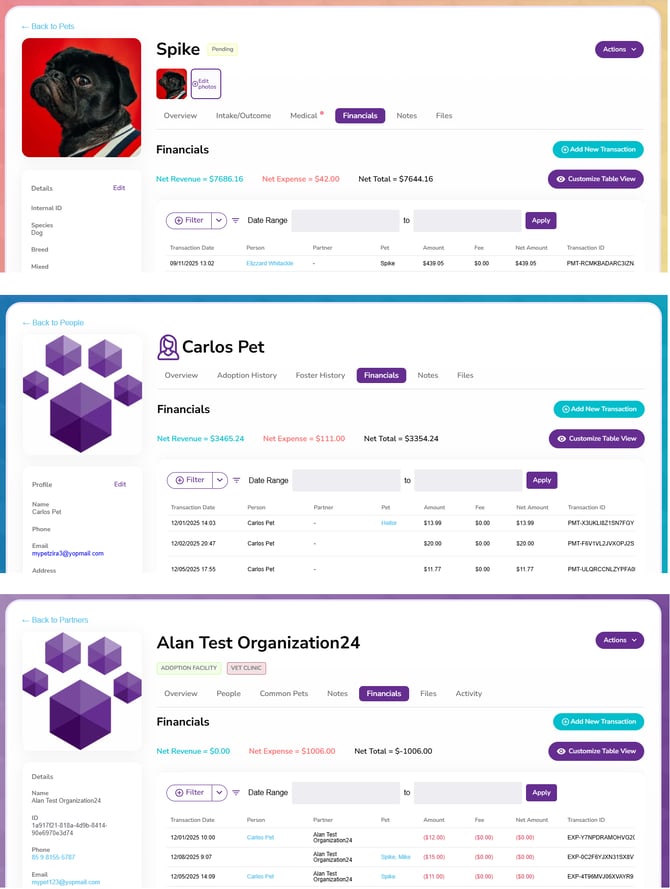
To start, navigate to the appropriate financials tab - either inside a pet, person, or partner profile:
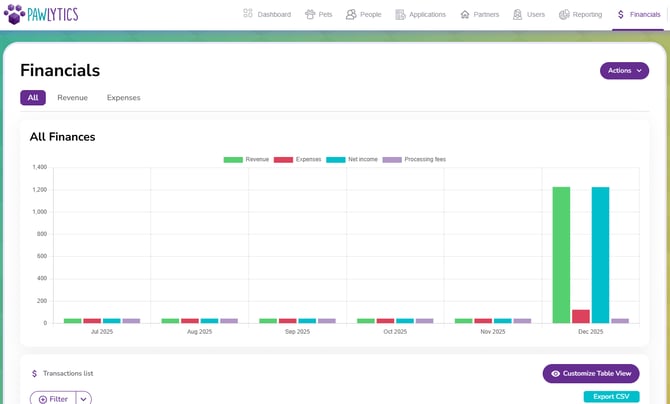
Or directly to the general financials section of Pawlytics:
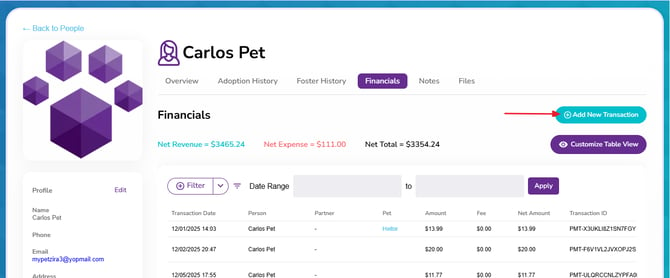
If you're starting from inside a pet, person, or partner profile, you'll click the blue button that says Add New Transaction:
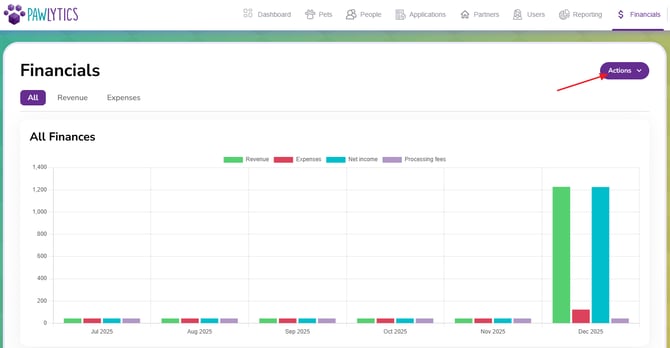
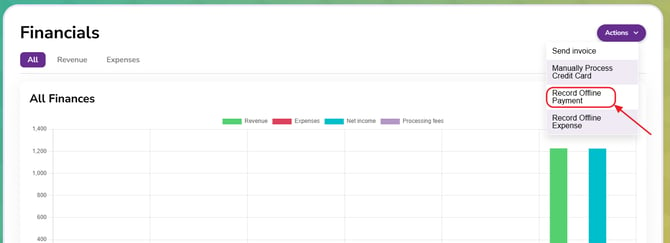
If you're starting from the Financials section, click the Action button in the upper right:
From here the steps are mostly the same, but certain information may be auto-filled based on where you're starting form. These auto-fills will be noted at the appropriate step.
Click the third option to Record Offline Payment:
Just as with sending an invoice, you can choose to start with a template or create a one-time/manual invoice. Additionally, you can also bypass a full template, and simply enter a custom amount if you just want to record a quick transaction. Click here if you'd like to skip invoicing and jump to entering a custom amount.
Using Invoices to Record Offline Payments
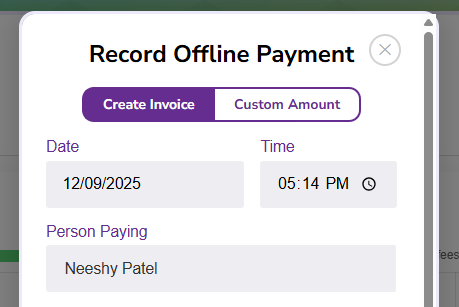
Because this is an offline payment (meaning payment happened outside of Pawlytics), you'll first have the option to edit the date and time it was received, then select the person you're recording the invoice for:
(Note: If sending from a person's financial tab, this will already be applied and you can skip this step):
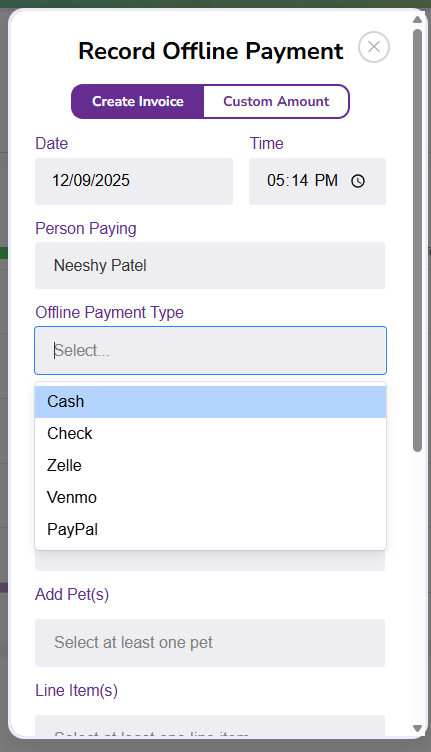
Next, choose the payment type. If you don't see the appropriate option for the type of payment received, you'll need to create it inside your financial settings:
If you'd like to start from a premade invoice template, you can choose from the dropdown next, or skip this selection if you're sending a custom, one-time invoice:
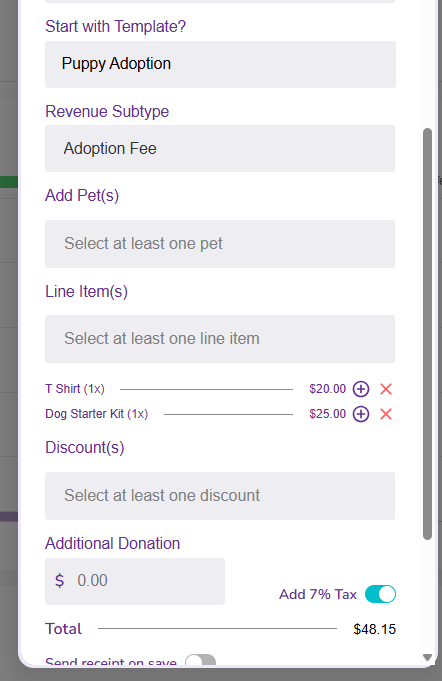
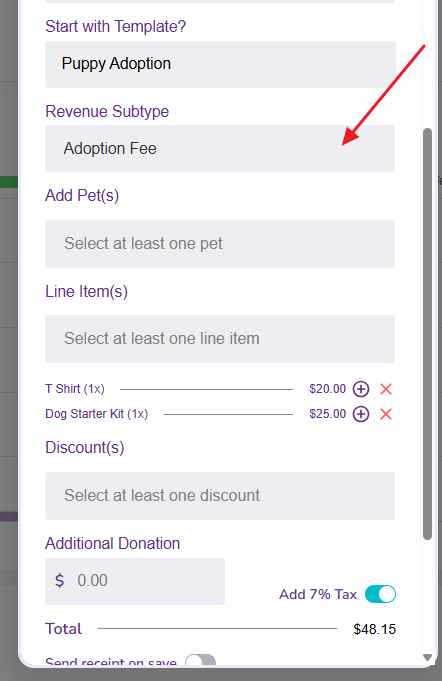
Next, if you're not using an invoice template, you'll need to assign a Revenue Subtype. If you don't see the appropriate subtype for the type of invoice you're sending, you'll need to create it inside your financial settings.
Note: If using an invoice template, this field will be auto-filled
Next select if this payment needs to link to a pet. You can choose to use the pet's adoption fee for the invoice (automatically linking the payment to the pet profile) or choose to just link the payment amount to the pet without using the adoption fee - and yes, you CAN add multiple pets!:
Note: If creating an invoice from a Pet's financial tab, the payment will automatically link to that pet, you only need to select if you want to use the Adoption Fee.
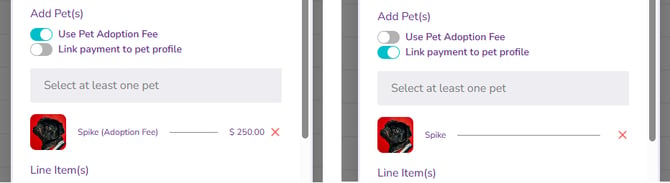
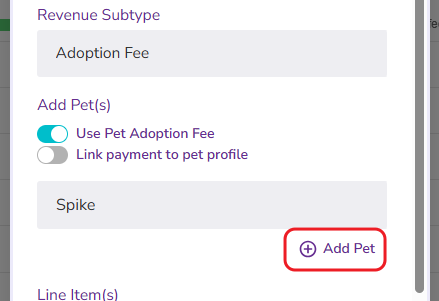
WHEN ADDING A PET, be sure that after you select the pet from the dropdown, you select the Add Pet button. If you do not see the pet added to the invoice as in the screenshot above, the pet has not been properly linked:
If you're not using an invoice template, the next step will be to add any line items or discounts, and same as before when adding a pet, be sure to click the Add button to add it to your invoice:
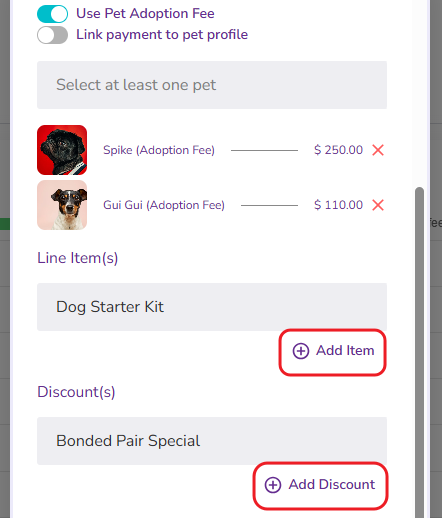
There is a plus button next to added line items in case you need to add multiples of a specific item:
Note: If using a template, these items can still be edited as needed to add or remove line items and discounts
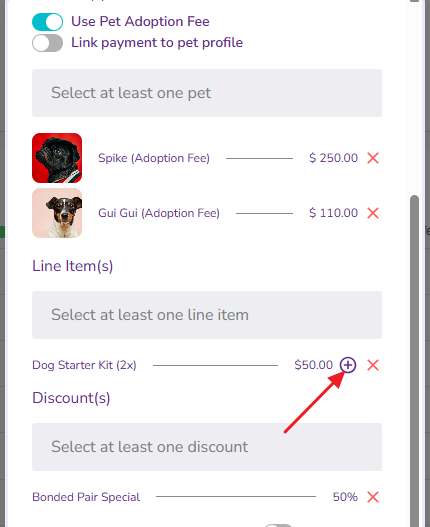
Lastly, add any additional donation this person made and toggle whether or not tax needs to be applied to this purchase:
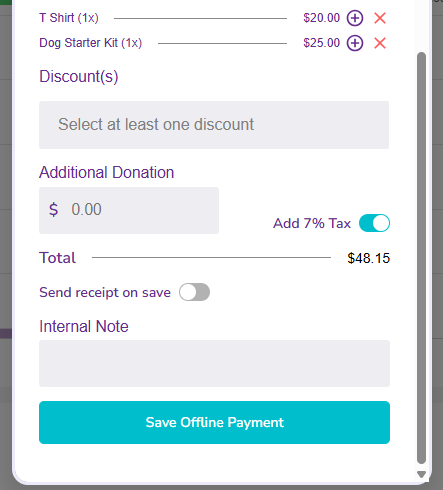
Before saving the payment, you can also choose to send a receipt with the invoice details to the payer/donor and add any notes that are internal to your team:
Note: The internal note will show in your {transaction tables} for your team's records, they will not display to the person receiving the receipt.
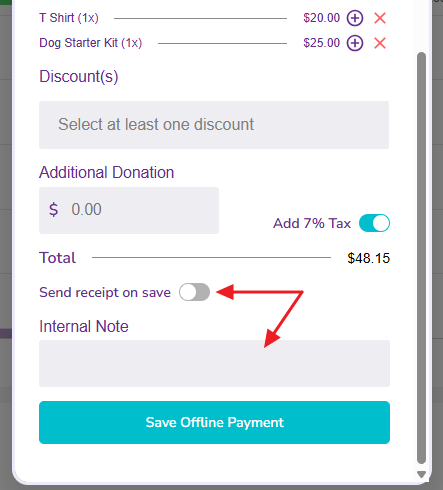
Hit save, and done!
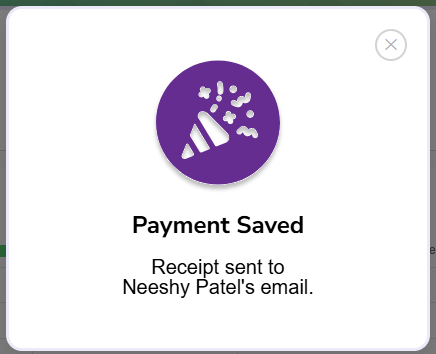
Click here to see an example receipt and to learn about our donor portal, Pawthority!
Using Custom Amounts to Record Offline Payments
Recording a payment using Custom Amount is a quick way to enter payments that don't need much details such as general donations or pet adoptions with no associated merchandise or discounts.
Because this is an offline payment (meaning payment happened outside of Pawlytics), you'll first have the option to edit the date and time it was received, then select the person you're recording the payment for:
Note: If sending from a person's financial tab, this will already be applied and you can skip this step):
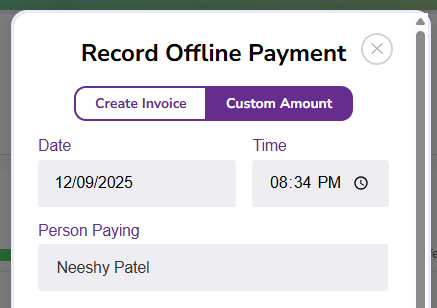
Next, choose the payment type. If you don't see the appropriate option for the type of payment received, you'll need to create it inside your financial settings:
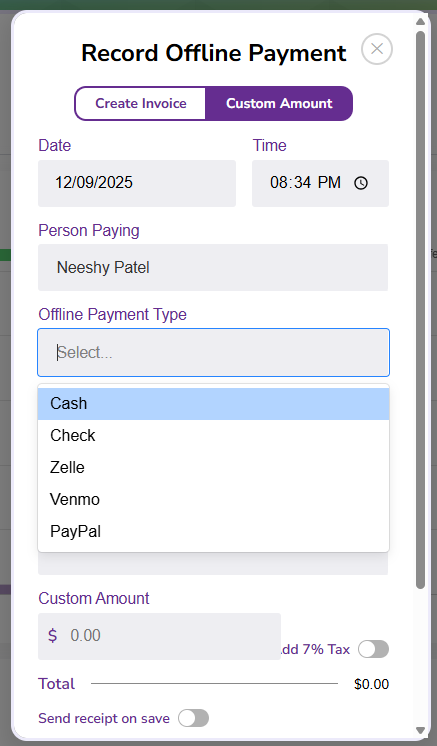
Select the appropriate Revenue Subtype (this will most likely be either an Adoption Fee or Donation, but again, if the option you need is not listed, you can create it inside your financial settings) and you can also choose to link this payment to a specific pet profile:
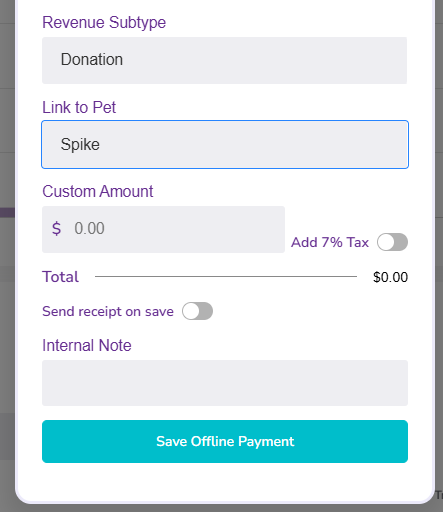
Enter the amount and select whether or not this payment should be taxed.
Before saving the payment, you can also choose to send a receipt with the invoice details to the payer/donor,
and add any notes that are internal to your team
Note: The internal note will show in your {transaction tables} for your team's records, they will not display to the person receiving the receipt.
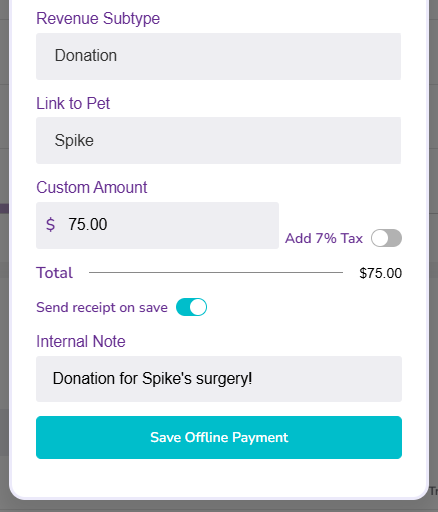
Hit save, and that's all there is to it!
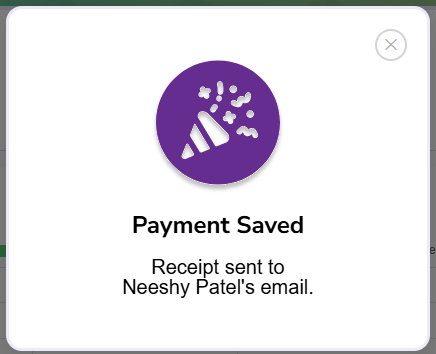
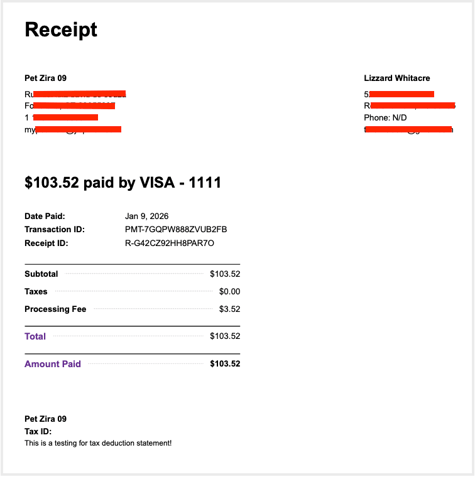
Click here to see an example receipt and to learn about our donor portal, Pawthority!